Past Project – Piñata Time!

Our oldest’s fourth birthday was all about dinosaurs. He knew the names of dozens of dinosaurs, what they ate, how they fought, etc. My husband decided to make a piñata worthy of his firstborn’s obsession.


I think it came out pretty fricking fabulous! It was made out of balloons covered in paper-mache.

Our boy was pretty happy with his piñata:

However, there was one little problem.

My husband had done such a good job ensuring the piñata was sturdy, that no one could break it. The birthday boy’s dainty whack certainly didn’t do the trick ;D

Three rounds later, all the kids were tired, so my husband decided to give it the old coup de grace and end its misery.

There was tons of red confetti inside, along with candy so when the piñata was opened (ha) it would come out like blood. My husband likes to be realistic that way.

We still have the head on our bookcase, along with some costume heads – I said we should mount them like hunting trophies, what do you think?

Button Initial

I’ve seen this craft in various incarnations on the blogosphere and Pinterest, and given that I had a plain canvas and a ton of white buttons, I thought I’d give it a try.

However, I first painted the canvas because I didn’t want it to be off white, I wanted some contrast with the buttons. I chose a cheery yellow for my project, then used Gorilla Glue to add the buttons after tracing them from a fancy “B” I printed.

For now it’s on my office shelf but I have not yet decided where its new home will be. It’s the perfect shade for the upcoming spring and summer seasons so I think it might earn a place of honor on our mantel.

Hope you have a wonderful weekend!!

Weekend Bloggy Reading

LOVE banner

I saw this sweet banner at Simple as That and knew I had to make something like it for my Valentine’s Mantel. Of course my turquoise obsession is permeating even this most “red” of holidays, but I figure, I can throw red somewhere else in the house. For now, this is what I came up with, based on Rebecca’s idea:

I went with scrapbook paper in an argyle pattern, some of the lines have glitter, which catches the light very nicely.

I layered turquoise hearts matted with white glitter cardstock. The hearts are topped with scalloped circles from the same white glitter cardstock and letter stickers spelling LOVE. The banner is “hung” from my fleur-de-lis candlesticks.

This banner can obviously be made in endless color/pattern/theme combinations, so I have a feeling there are more pretty banners in my future. Thanks to Rebecca for this great idea!

The Basket o’projects, update 1

A couple of weeks ago, I posted about a small step I took to use up my craft supplies – making a non-threatening basket with a few items at a time so going through the garage-ful of craft goodies didn’t overwhelm me.

I am happy to say I have recently used a couple of items – yay me!!!

The scalloped labels were used in my pantry, and then I took the adhesive magnets you see on the bottom right and made a few valentines from the boys.

I printed out some business card-sized pics and adhered them to the magnets, took pinked-edge cardstock from my stash and added a little cream colored cardstock for the boys to sign.

The little brown box that was holding the magnets and labels got transformed with, you guessed it, the rest of my peacock paper. Man, I love that thing.

I chose the glossy-finish variety of Mod Podge and I just love the shimmer!

Thank goodness I am out of the peacock paper and next time I go to Paper Source I’m going to get something else, otherwise I’ll end up wallpapering my house with it.

That’s the end of my blog week but my husband and I are working on a huge project, so it is going to be a busy weekend! Hope yours is a great one!

Project Life

I’ve been scrapbooking for about 10 years. My first attempts very fussy and uncoordinated, as first attempts often are. I pared down the embellishments, but it was still a struggle to keep up with the thousands of pictures I took of my boys every year.

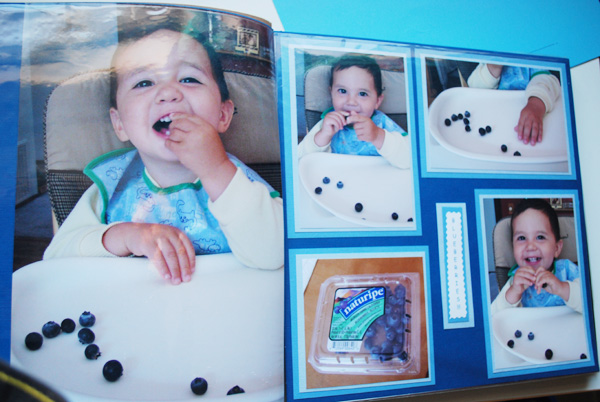
This is one of my favorite layouts ever, celebrating my oldest’s love of blueberries. However, all the printing, trimming, matting, etc. was taking a lot of time, something I did not have with two little boys running around.

A year ago I decided to go digital, which made my life a lot easier. And freed up a lot of space in my craft drawer 😀

I wanted something even simpler, though – something where I wouldn’t have to worry about the background or the alignment, something that would allow for quick notes and the endless bits of paper that come with the business of life. When I saw Becky Higgins’ Project Life, I decided it was what I’d been looking for.

I ordered the Core Kit in the Turquoise edition, of course 😀

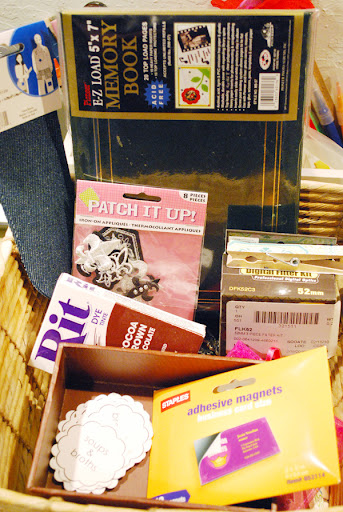
The Core Kit includes 4×6 and 3×4 cards for your layout titles and journaling, stickers with days of the week, months of the year, dates, so you can apply them to the cards or your photos, etc.

The kit components are meant to be used with the coordinating photo pocket pages, which come in a variety of layouts. Due to the popularity of the product (and the timing as well, everyone getting ready to document the past year, or the new one) the photo pocket pages were not available, so I got a multi-pack from We R Memory Keepers, which work with the Project Life-sized cards.

I didn’t get the PL Cardstock Kit because I want the freedom to use whatever paper I choose, if I decide to use a paper background. Also, I have SO MUCH cardstock and solid paper in my stationery box that I can probably get by for a few months. Or years, if I’m honest with myself. Also, the page protectors I bought fit in a regular post-bound scrapbook album, so I didn’t get the Project Life binder because I already had an album for this year.

I am pretty excited to start my 2012 album. I made a baby album for each of my boys when they were born, but other than those, I do an album per year. Sometimes it’s more than one album, like when we went to Disneyland for the first time, so I just label the spine accordingly – 2010, or 2009 Jan – May, etc. – I don’t limit myself or try to fill up pages, I just scrapbook according to the pictures I have. And that was way too many sentences that started with “I”.

Okay, one more. I’ll update you on my Project Life progress in a few weeks, there are 5 pages left in 2011, and the photo machine at Target was broken so I couldn’t get my one-hour photos last week. Arg. Hate to say it, but in five times I have ordered pics from Target, only once has the process gone smoothly. Time to find someone else, I say!

Are you trying Project Life or some other way of documenting your life? I’d love to hear about it!

Oh, FYI – I purchased everything I mention in this post. If I’m ever given/gifted anything (ha), I’ll make sure I tell ya!

Stereo stand to craft tower

This old stereo stand had been languishing in the kids’ playroom — and my office — for several months:

I thought it had great potential for craft storage, and decided to give it a new look.

First came a coat of chocolate brown paint for the outside, a coat of Antique Gold for the shelves, and a Command hook for the side:

For the inside I chose my favorite peacock paper from Paper Source:

I gathered craft stuff that was scattered all over the house, and some random containers were given a new life. I didn’t want things matchy-matchy, and neither did I want to spend any money. Everything was done with items I already had.

Here you can see some of my paper crafting and sewing supplies:

Paper punches, threads and ribbons, and my blank card packs. I have so many, I really need to start using them!

On top, my pencils and markers, decorative scissors, various adhesives, and random bits and bobs, along with a tray I painted a while ago with my newest craft book:

Yes, it is The Martha’s Holiday Crafts book, and it is awesome. Some of the crafts are a little advanced to do with my boys, but I’m working on adapting a few.

So here it is, my sweet little craft station. I love that I transformed it without spending a cent and that it is now a useful piece instead of just storing old VHS movies and gathering dust.

I hope you enjoyed this makeover!

Featured At Serenity Now

It's OverflowingThursday Favorite ThingsWeekend Bloggy Reading The Shabby NestFurniture Feature FridaysPositively Splendid

Basket o’ projects

I don’t make resolutions for the new year but I do have a dreaded Basket o’ Projects staring me in the face. Oh believe me, we have tons and tons of craft and project stuff in the garage that we really need to go through but since every bit of advice I’ve read tells you to “start small”, I figure this innocent-looking basket can be more motivating than a whole garage worth of stuff.

So before I embark on any new project, i.e. anything I need to purchase stuff for, I need to use up three items from this basket.

What’s in here, you ask?

Well, let me tell ya – from the back to the front, sorta:

  • A small scrapbook I’ve had for 3 years. It was meant to be a bridal shower gift with recipes brought by guests but no one brought anything so I couldn’t make the gift.
  • Patches for my boys’ jeans. And boy, do they need them. My oldest loves to save the world and slide all over the kitchen floor , so his jeans have lots of holes in the knees.
  • A bunch of fleur-de-lis patches my mom got me.
  • A few clothespins I mod-podged with spring scrapbook paper. Two years ago.
  • Brown fabric dye.
  • A digital camera filter kit I got 4 years ago.
  • Adhesive magnets. I used a few because we love to give out fridge magnets with pics of our boys to the grandparents and aunties, but I need to use up the rest.
  • Labels I made for my freshly re-organized pantry.
  • Magnets and labels are sitting on a cute notecard box I want to mod-podge for jewelry bits.

So there you have it, my current Basket o’ projects. I hope to start using up some items and add a few more from the garage. That way it doesn’t look so overwhelming – I hope!

Candy cane candle

After seeing this idea on pinterest, I decided to make a couple of holiday crafts with some candy canes – that’s right, Christmas candle crafts with candy canes. It’s all about the alliteration.

I have a couple of glittery white candles, one of which I chose for this project. The easiest way to keep the candy canes under control was with the help of a rubber band:

Once all the candy canes were secured, I added a pretty bow to cover up the rubber band and give the finishing touch:

Simple, but so pretty and colorful:

Hope you enjoyed this little craft!

Thursday Favorite Things

Thanksgiving Mantel

As you might have seen in my silly turkey garland post, our mantel has been de-Halloween-ed and is now ready for Thanksgiving. But last Thursday the boys and I made a little something to add up there.

I got the inspiration for this from pinterest, of course, but I decided to make this craft with stuff I had on hand.

I have been saving glass jars for the past few months, I’m trying to replace plastic food storage as much as I can, and I had a few pasta sauce jars that weren’t all the same size but they worked in a group.

Then I added a band made of scrapbook paper, created the letters and border on Photoshop, and added some curling ribbon. The contents of the jars are dried out corn husks and stems from my backyard.

I think it looks nice atop my dark mantel:

As you can tell, my boys have started to pick off some of the poor turkeys’ eyes and even one of the faces (look to the right end of the garland). As long as they don’t eat them, I’m fine with it 😀 The dried sunflowers on the right are also from my backyard, we got tons of seeds, so yummy!

Hope you have a great Monday!

Tip Junkie handmade projects